

One of
the most common occurrences on the battle fields of the 41st
millennium, the Imperium attempt to stamp out a chaos uprising before
it can take hold of a sector. In this game, the Imperium of man,
represented by the elysian D-99 drop troopers, aided by the Tempestus
Militarum and a Knight house, attack the forces of chaos. By this
chaos force is just the humans of a planet unhappy with their
Imperial oppressors seeking aid from the daemons of chaos. Its a 1875
point game of Tactical Escalation.
The Armies
Forces of Chaos
Renegades and
Heretics: Combined arms Detachment (Primary)
Renegade Command Squad
– 90 (warlord: tactical genius)
6 men, Covenant of
Nurgle, lascannon, krack grenades
40 Plague Zombies –
120
Infantry Platoon
Command – 100
20 men, Demagogue,
chaos sigil, krack grenades, militia training, 2x flamer
Infantry squad – 85
20 men, chaos sigil,
krack grenades, militia training
Infantry squad – 60
2x melta gun, militia
training
Chimera – 70
militia training,
autocannon, heavy flamer
Infantry squad – 60
2x melta gun, militia
training
Chimera – 70
militia training,
autocannon, heavy flamer
2 Leman Russ Battle
Tanks – 280
Leman Russ Demolisher –
170
militia training
Heavy Ordinance Battery
– 90
Medusa cannon, militia
training
Chaos Daemons: Combined arms detachment
Herald of Nurgle – 95
Locus of Fecundity
(feel no pain), level 1 [smite, something I have forgotten]
20 Plaguebeaerers –
135
3 Nurglings – 45
Soul Grinder – 180
Daemon of Nurgle,
Phlegm
Soul Grinder – 180
Daemon of Nurgle,
Phlegm
Total points: 1875
Forces of the
Imperium
D-99 Combined Arms
Detachment (primary)
D-99 command squad
4x plasma guns
Veteran squad
6 men, missile launcher
Veteran squad
6 men, missile launcher
Executioner squad
7 men, 6x melta guns
Valkyrie
rocket pods, multi
laser
Taros Venerator
twin-linked lascannon,
2x hunter killer missiles
3 Drop turrets
lascannons
Vulture
punisher cannons
Knight Detachment
Knight Errant
Tempestus: Allied
detachment
Commissar
9 Scions
2x melta guns, power
first
Taurox prime
Galting cannon, storm
bolter
The
Mission
We roll
for the mission and get tactical escalation with hammer and anvil
deployment. This is a little awkward as it means I have less room to
deploy my hordes of men, but it also means he has less useful places
for his fliers to go. So it works against both of us. We place the
objectives around the table then roll for deployment. The objective
are placed as follows:
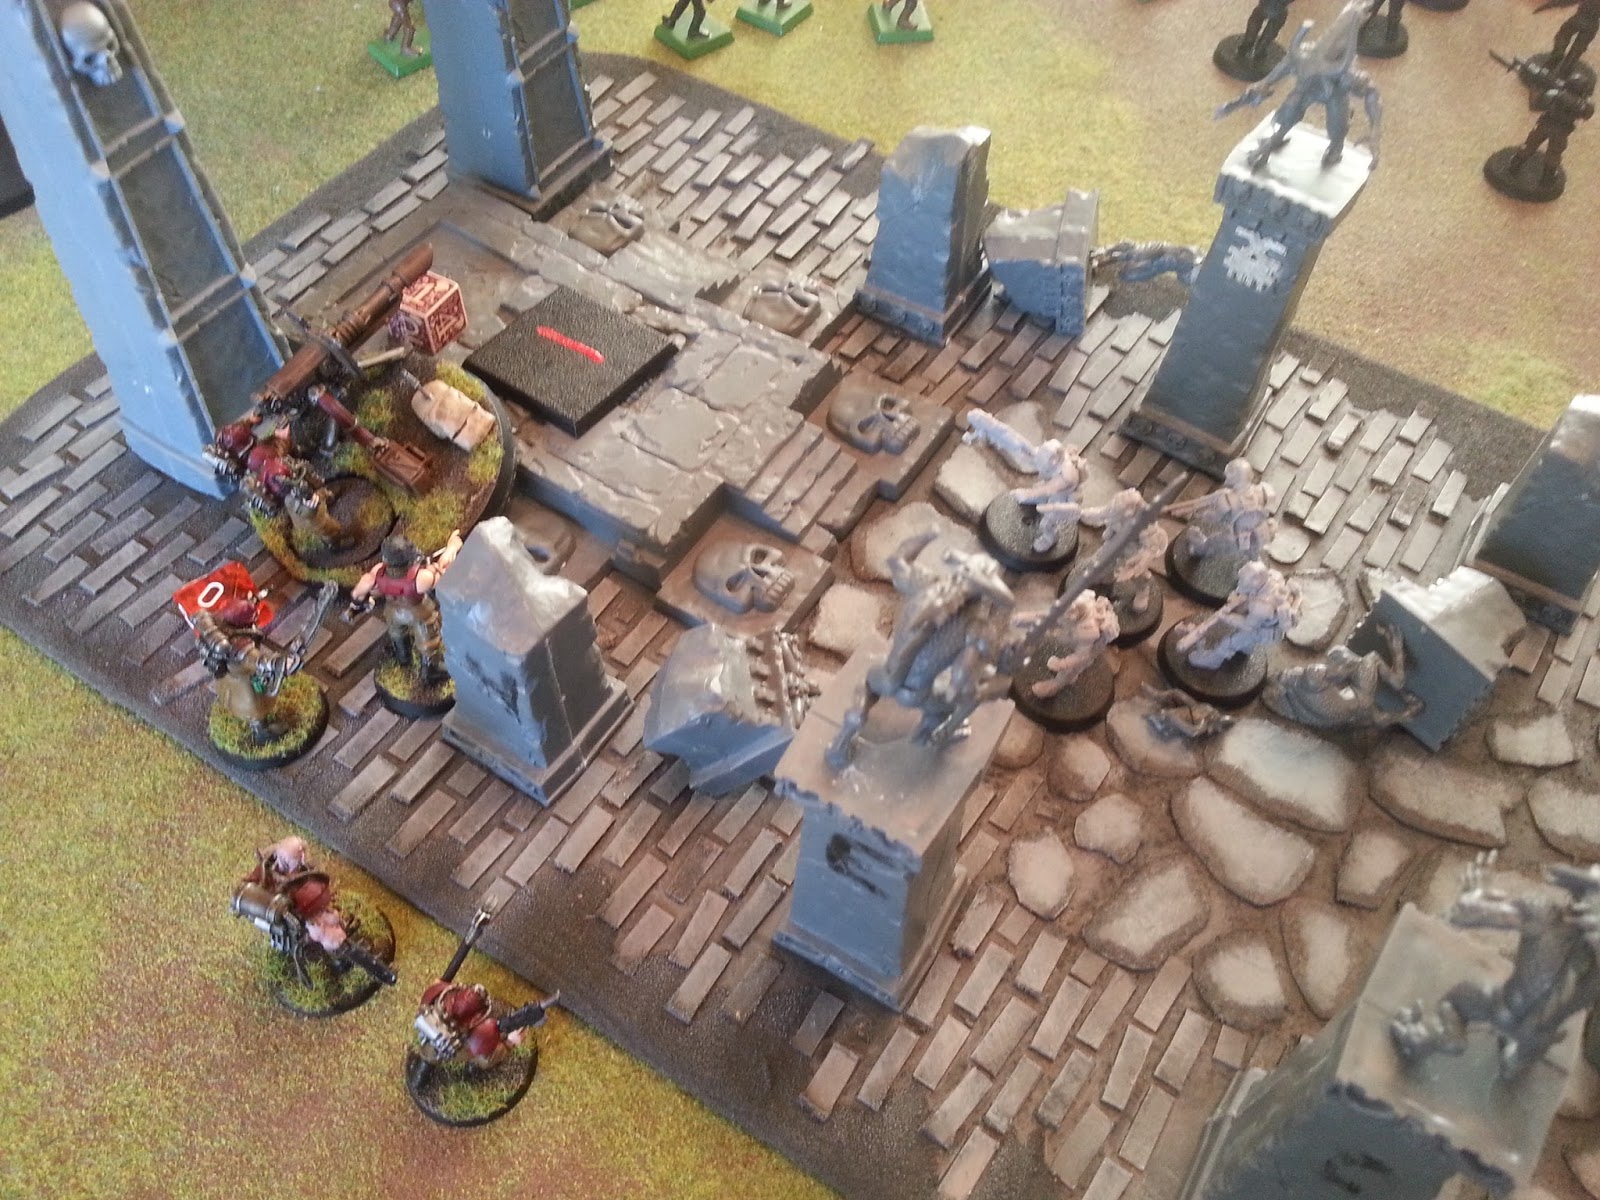
Temple of
khorne (bottom of photos)
Between
the two rock clusters (middle right in photos)
Large
woods (woods in the centre of the table)
Next to
tower/tree
Other
temple (top right of photos)
Behind
defence line (top right)
The chaos
side wins deployment so I set up first. I place the battle tanks at
the back on the right, with a soul grinder in front of them, and both
chimera transports ready to move up the right flank. On the left the
demolisher and the other soul grinder get deployed. In the centre
behind the rocks I place the Medusa. In the temple of khorne I place
my command squad holding the objective. The infantry then just fill
the gaps, with the zombies at the back on the left, the plague
bearers in the middle ready to move up and hopefully take on a
knight. The other infantry squads are deployed in cover, the infantry
command starts in the ruin with the command and the other unit starts
in the woods on the left. I keep the nurglings in reserve, ready to
deep strike in.
In
response my opponent doesn't have much to deploy. The knight goes
front and centre, ready to attack my lines. The taurox starts behind
rocks for cover, while the taros deploys behind the tree/tower. Both
veteran squads start in cover, one on the right behind the defence
line, and the other in the woods on the left. The rest of his force
is in reserve.

Night
Fight: No
Steal the
initiative: No
The
Battle
Chaos
turn 1
All of my
forces push forwards ready to attack the imperial forces before their
reserves come in. The objective in the khorne temple turns out to be
sabotaged, so my command squad backs off a little so the warlord is
last to take a wound from it. Khorne doesn't suffer the followers of
Nurgle in his places of worship.
Firing
the big gun for the first time, the Medusa fires at the Knight in
front of it. The shot hits and gets a glancing hit despite having two
dice rolls to penetrate. Both of the battle tanks target the knight
as well but the shield prevents all the damage. Both soul grinders
attempt to take a hull point or two off the Knight, one shot is
stopped by the shield but the other glances it as well, reducing it
to 4 hull points. On the left the demolisher can just about see the
Taros and immobilises the vehicle, and reducing it to 1 hull point.
The command squads lascannon targets the knight but again the shield
stops the shot. Infantry, with no weapons to really fire, run.
Score:
Nothing

Imperium
turn 1
Coming in
from reserve the sentry guns take a risky deep strike right behind
the unit of battle tanks. They lock on and I am now in trouble.
Stomping forward, the Knight goes right for the soul grinder on the
right getting in charge range. The infantry hold their ground but the
Taurox pushes forwards, getting into the woods, ready for the scions
to do something next turn.
 The
obvious shooting starts, with the turrets firing their lascannons
into the rear armour of the battle tanks, one of them explodes and
the other gets shaken. Another lascannon shot, this one from the
Taros hits the demolisher tank but fails to do any damage to it.
Firing its gatling cannon, the taurox targets the plaguebearers but
due to the cover of the trees and shrouded, they only take a single
wound and feel no pain fails to stop it, killing the daemon. Finally
the knight acts, it fires its heavy stubber at the soul grinder in
front of it so it can charge it. Then it fires its cannon at the
medusa, causing 2 wounds on the artillery. Missiles from the infantry
squads do nothing.
The
obvious shooting starts, with the turrets firing their lascannons
into the rear armour of the battle tanks, one of them explodes and
the other gets shaken. Another lascannon shot, this one from the
Taros hits the demolisher tank but fails to do any damage to it.
Firing its gatling cannon, the taurox targets the plaguebearers but
due to the cover of the trees and shrouded, they only take a single
wound and feel no pain fails to stop it, killing the daemon. Finally
the knight acts, it fires its heavy stubber at the soul grinder in
front of it so it can charge it. Then it fires its cannon at the
medusa, causing 2 wounds on the artillery. Missiles from the infantry
squads do nothing.
Assault
phase and the knight charges into the soul grinder on the right. Its
hammer of wrath does no damage but thanks to defensive grenades from
daemon of nurgle, the knight only gets its basic attacks, which
reduce it to 1 hull point and shake it, which is ignored. Very badly
damaged, the soul grinder attacks back and hits with all 4 of its
attacks, and then 4 penetrating hits. The knight is wrecked turn 1!!!
The blast scatters into the plagebearers and 9 of the daemons die
with 3 infantry getting dragged into hell with them.
Score:
First blood (to chaos)
Chaos: 1
– Imperium: 0

Chaos
turn 2
Erupting
from the warp, the nurglings deep strike in but scatter and end up
next to the woods in the centre. Again my foot troops move forwards
getting closer to the enemy. In my back field the lone battle tank
turns around to face the lascannon turrets as it is too slow to
escape, it might as well make it as hard for the lascannons as
possible. Up the right flank the chimeras carry on their way.
Again the
medusa fires a shell high into the air and it lands on the Taurox in
the woods, but only manages to shake it. Supporting fire from the
chimeras take another hull point off it but its not enough. As I need
to make a unit fail a moral test as an objective, both soul grinders
target the infantry on the right trying to force them to run, one
scatters off and the other kills 2 after they go to ground. They hold
though. All my infantry (bar the slow and purposeful units) run
again. To finish the demolisher targets the taros again but the shot
scatters.
Score:
Nothing
Chaos: 1
– Imperium: 0

Imperial
turn 2
All of
the reserves come in, which is rather an issue for me. He deep
strikes his D-99 command squad behind my warlord attempting to get a
quick kill, but they scatter into the centre of the temple of khorne.
The vulture swoops in on the left going for the infantry which are
almost on the Taros. Another deep strike, this one locks on though as
the Valkyrie also comes in my back field on the left. Moving though
cover, the taurox gets out of the woods and drops off the scions next
to the damaged soul grinder.
Again the
turrets first, but thanks to armour 14, nothing happens. On the left
the infantry in the woods shoots at my infantry and gun down 6 of
them (most causalities caused by a frag missiles) and then the unit
if finished off by the strafing run of the vulture. Aiming their two
melta guns, the scions attempt to take down the soul grinder, but
despite their training, both shots miss. Missile pods from the
valkyrie targets the infantry in my back field, both shots scatter
off a little, and kills a single plaguebearer, and reduces the
infantry down to 7 men, but they hold. Using all of their plasma
guns, the D-99 command changes its target, and shoots at the medusa
crew, killing off 3 and taking a wound off the gun. The remaining guy
panics and runs for his life, effectively taking out the gun for the
rest of the game.
Score:
Nothing
Chaos: 1
– Imperium: 0

Chaos
turn 3
With the
enemy warlord on his own, the zombies move back ready to swarm over
him. The renegade infantry move back to lend a hand while the command
squad gets ready to charge in. The for most chimera moves towards the
infantry on the right, ready to unleash its heavy flamer on them.
Still the daemons move forwards, and the soul grinder on the right
gets ready to deal out some death to the newly emerged scions.
Turning
its turret to face the scions, the battle tank fires attempting to
kill a few of the storm troopers and maybe wreck the taurox, but the
shot scatters 9 inches, right on top of the damaged soul grinder,
wrecking it... much to my opponents amusement. I have to admit I
laughed as well. At the back of the table, my infantry target the
command squad and kill 2 of the veterans. Flamer ready, the chimera
burns 2 more of the infantry, while the last soul grinder attempts to
kill off the rest, but the shot scatters. The demolisher shot also
scatters off its target.
Assault
phase and the zombies charge into the command squad, aided by my
warlords command. I issue a challenge and he accepts, striking first
he fails to do any damage. My warlord strikes back and while hitting
with all of his attacks he fails to wound. Neither model in either
command squad causes any wounds, but then the zombies attack,
dragging the 2 veterans from the command squad to their death. Seeing
this the D-99 commander attempts to run for his life but he is
surrounded, and ripped apart by the zombies. At the end of combat, I
get to roll a D3 and 3 of the corpses get back up, animated by the
zombie plague, and join the zombies numbers.
Score:
psychological warfare, assassinate, slay the warlord
Chaos: 4
– Imperium: 0

Imperium
turn 3
Spreading
his forces out, the scions go for the objective in the ruins while
their transport goes into the woods to steal that objective. The
vulture moves round to see my command squad while the Valkyrie goes
after the plague bearers.
Again the
turrets do nothing to the leman russ battle tank. Melta guns at the
front, the scions shoot at the front chimera and explode it, killing
7 of the renegades and a single scion. All of the shots from the
vulture target my command, with 16 wounds they go to ground, and some
how my warlord lives with a single wound and so does the heavy weapon
team, every one else is dead. Rocket pods form the valkyrie fire at
the plaguebearers and kill 3 of the daemons, and then the taurox
manages to bring down 1 more.
Score:
hold objective 5, 5 and 6
Chaos: 4
– Imperium: 3

Chaos
turn 4
I want to
try and get the scions off the objective in the ruins, so the chimera
tank shocks them! A single melta gunner attempts to death or glory
it, and blows its autocannon off, unfortunately it doesn't stop the
tank and he gets crushed to death while the rest of his squad
scatters off the objective to avoid the same fate. The plague bearers
move though the woods straight towards the taurox, attempting to
wreck it. The soul grinder moves towards the taros.
The
demolisher changes its target and shoots at the infantry in the woods
on the left and kills 5 of them! They then run for it. Phlegm gets
shot at the Tauros but it scatters, letting it live a little longer.
All of the chimeras weapons snap fire at the scions, but the heavy
bolter, las guns arrays, and even the guys in the transport fail to
do anything.
Assault
phase and I realise I didn't move the nurglings so they charge the
taurox so they can move. The plague bearers then charge in and wreck
it with ease. On the left I need a high roll but get it with a 10,
allowing the soul grinder to charge the tauros and finally kill it.
Score:
Recon
Chaos: 5
– Imperium: 3

Imperium
turn 4
As its
the only thing that can grab the objective next to it, the valkyrie
goes into hover mode and moves to the objective to the right of my
deployment zone. The vulture also moves so it can still see my
command squad. His running veterans on the left rally.
Finally
the turrets wreck the leman russ in front of them. Rather
unsurprisingly the vulture gets its mark, killing off the command
squad, gaining slay the warlord. Shots from the infantry on the right
kill off the few remaining infantry left from when the chimera
exploded before.
Assault
and the scions, not happy with having to leave their ruin, charge the
chimera and wreck it with krack grenades. As the rear hatch is
covered, the infantry are forced to emergency disembark, and blow a
hole in the side of the tank and scramble out, meaning they can't do
anything in my next turn.
Score:
slay the warlord, objective 2, overwhelming fire power (1)
Chaos: 5
– Imperium: 6

Chaos
turn 5
As I have
just lost the lead I need to get as many points as possible. I send
the nurglings towards the scions to try and hold them up while the
zombies swarm over the objective in the khorne temple, I know my
opponent needs it and I have to stop him getting it. The few
remaining infantry I have in the middle of the table who can act,
move straight towards the valkyrie, as there is a chance I cha blow
it off the objective which I now need. Carrying on its course, the
soul grinder goes after the infantry on the right.

The
demolisher misses the newly rallies infantry, unfortunately they will
be able to act properly next turn. Unfortunate the soul grinder
doesn't fare much better, as its shot scatters a lot, but it does
still clip 1 guy killing him.
Now the
important phase, the nurglings attempt to charge the scions, and take
a single wound from overwatch, but they roll a 10 and make the
charge. I lose none from the regular attacks, and then some how
manage to kill 5 of the scions including the power first which had
yet to attack, which would have murdered all of the swarms. The
commissar keeps the unit in the fight though. In my deployment zone
the infantry roll a massive 12 inch charge! As they are going though
cover its only 10, but they still make it. I have about 7 guys left,
and I get 4 hits, and 3 useful results, wrecking the flier and
forcing out the executioners. But more importantly, the objective
secured vehicle is gone, and with only an elite choice on the
objective my troops can take it. But will it be enough. As their
transport had taken a penetrating hit, the executioners need to take
a moral test, and fail, so they can only snap shot next turn.
Score:
objective 2, 3 and 1.
Chaos: 8
– Imperium: 6

Imperium
turn 5
He needs
the zombie objective so drops into hover mode and gets as close to it
as possible, and must clear a 3 inch zone around the objective.
The
executioners shoot at the infantry that just destroyed their
transport but they are forced to snap shoot, and miss. The turrets
then target the infantry and kill off 1. Finally the vulture shoots
at the zombies, and only manage to kill off 6 due to the cover save
and 4+ feel no pain, its not enough to grab him the objective.
In the
assault phase its at lot less exciting as both sides take a single
wound for a drawn combat.
Score:
Behind enemy lines
Chaos: 8
– Imperium: 7
We roll
to see if the game carries on....
End Game
(line
breaker)
Chaos: 9
– Imperium: 8
Victory
to the forces of chaos!!!
Post-Battle
My first
win with the Renegades in such a long time, it feels good even if it
was purely down to a unlucky roll on my opponents first turn with his
knight. But some times the big guys get smacked about by the slightly
smaller walkers. But it was such a shame that the soul grinder got
team killed in the game.
Another
first, this was the first game using the Medusa, its short range for
an artillery piece is awkward, and needs to be close to the front
line putting it in danger, but its toughness 7 helps. In this game,
my opponent felt pressured into trying to deal with it and did quite
quickly. I didn't protect it very well and I will need to watch that
in the future, as it could be important to keep it alive to take out
2+ save units.
I had no
idea what to do when he dropped in his sentry guns, and holding it up
with the russ was all I could think of, what do you all think?
Anyway
hopefully I will have more reports for you soon.
Sweet, another batrep! And finally a win, awesome! Good job!
ReplyDeleteThe only thing I can think of how you could protect the Russes next time would be to bubble wrap them with cheap infantry, so he can't deep strike the sentry guns behind them.
I knew you were going to win !!!
ReplyDeleteBubblewrap tanks in zombies or make sure rear arcs are against solid terrain. To be honest, battke tanks aren't that great in Renegade lists as no tank commanders, you're better off spamming artillery, Sentinels, allies like Soul Grinders or Plague Hulks or various Lords of War
ReplyDelete